Here at Duplication Centre we offer all three of these options for giving your CD/DVD or Blu-Ray the fully professional finished look.
What is the difference?
CELLOWRAP:
We use this process for wrapping Single Standard DVDs along with Double DVDs,3 Way and 4 Way DVD cases and for all Standard Single and Double Jewell cases.
This process is semi-automated and applies a thick plastic outer wrap by a heat sealing process, to pre-cut pieces of the plastic wrap.
SHRINKWRAP:
We can use this process to wrap any of the cases we offer in the duplication process using PVC shrink film (gauge 15 micron) including:
Jewell Cases both single and any multi-way, DVD cases single and multi-way, Blu-Ray cases both single and multi-way,Clam Shells, Digi-paks, and all the slimline versions of the cases that we offer on the web-site. We can also use shrinkwrap on our digi-paks and card wallets.
Like cellowrapping this is a semi-automated process where the roll of wrap is cut to size using a heat bar, sealed and then literally “shrunk” to fit the case being wrapped with a heat gun.The customer then rips this off to open the product.
Both of these processes produce fully sealed units which not only look very professional but are then fit for sale on the internet. For many company’s cellowrap /shrinkwrap is a requirement acting as proof that the product is new and has not been “tampered” with.
Both are easily removed and then the wrap needs to be discarded.
CELLOBAGS:
These are bespoke bags that we have are made-to-measure for products that we offer them on; they fit snugly and look professional.
They are clear and can be sealed with a sticky panel much like a self-seal envelope.
The advantage with these is that with careful removal your product can be reinserted for added storage protection.
The process of applying these is completely manual.
It is available on all the single and double cd jewell cases (standard and slimline) and on DVDs both single double 3 and 4 way as well as the slimline version.
It is the most popular choice for our card wallet and digi-pak products.
These are all optional additions to the packing of your order and not essential unless you plan to sell on web-site like Amazon where it is a must!
All of our customers are producing a CD,DVD or Blu-Ray to communicate Audio and/or Visual, Music, Spoken Word, Information or Performances to their audience/customers. This is the main event!
With a physical CD, DVD or Blu-Ray however there is another dimension/medium available to express visually in Word, Picture and Images through the use of printed covers and booklet inserts. This recruits yet another of our senses and gives an additional aesthetic dimension to your product. For most customers this is a really important feature of the duplication process and for many is not just the imparting of information, but another expression of art.
Our clients can spend a great deal of time designing artwork for their orders so with this in mind we invest in a State of the Art printer technology which is second to none for print production.
We only use the highest quality card and paper on all the associated printed parts that come with CD, DVD and Blu-Ray Production.
How often have you pulled out a CD/DVD booklet that is thin and shoddy quality? We know that you want your duplication order to be of a professional standard so we only use card that is 350gsm and 170gsm papers. These are good to handle and allow the print quality to show at its best. Your carefully planned project deserves no less than the highest quality printed parts and that is what we provide.
We also manage to remain Eco-friendly whilst maintaining this high quality by using FSC certified sustainable stock for our printing 🙂
We have always favoured the Amaray DVD cases. Their quality in the industry is well known and we value using high quality professional cases for all our orders.
We just thought that we would update you about our choice to use the Amaray Ecolite cases whenever we can which you will notice if you look on the inside of the case that it does not carry the usual AMARAY branding stamp.
These is however an itc number embossed on the spine of all Amaray Ecolite cases so you know that it is genuine.
This information comes directly from Amaray and we feel is good justification to continue to use the ecolite case for our orders.
The Ecolite was a down weighting to deliver the same performance of product but 7g less material which is 14% weight saving.
To achieve this we re inserted face plates to new weight.
The material remains the same which is 100% polypropylene even the clear inlay film is. PP(polypropylene) is a great plastic that recycles easily up to 20+ times and can be reused for multiple products. The colour pigment is also PP based clean food grade. Therefore if/when the product reaches end of life the Amaray case can be fully recycled.
Finally within Amaray manufacturing UK we create zero scrap – all machine rejects/start up waste is fed back in through the process and reused.
This article is revisiting the topic of casing and giving a more up to date analysis of what is available and popular at the moment.
Over the last few years there has been a great shift in the type of CD/DVD casing chosen by customers.This is partly due to the increasing access we all have to the digital world, where personalising and producing bespoke products is much easier and ever more professional in outcome.
Whether you are a band selling at gigs or a school producing a play or a company producing product or financial information it matters how you present your CD/DVD to your customer or client.
What are your choices?
The first decision to be made is whether you want printed parts with information on for your customer to read…if you don’t then your options are:
FOR YOUR CDS
A plastic Clam Shell Case or a plastic wallet ; both of these will allow your onbody print on the CD to show through and are a good and really low cost option.
The plastic wallet comes in single or double versions and also those used for inserting into books and magazines with clear self adhesive strips.
If you do want printed parts there are a wealth of options and things to consider.
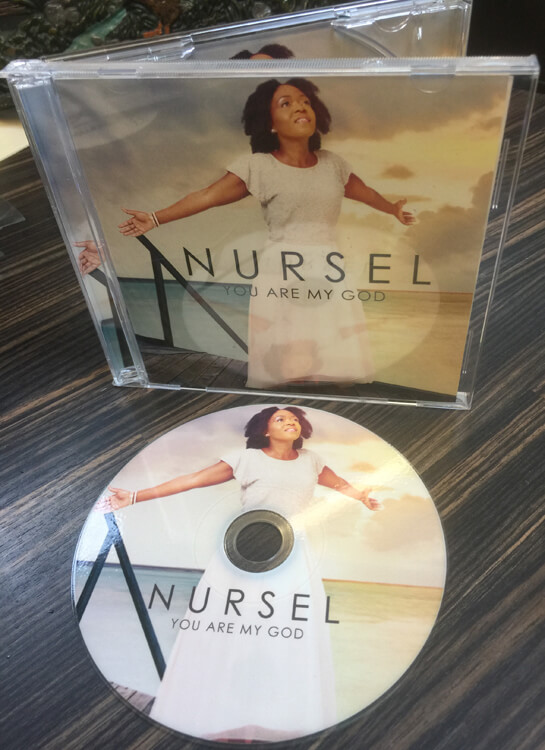
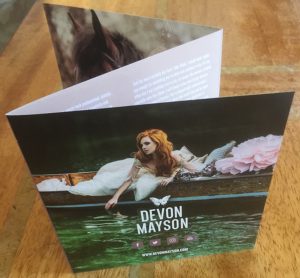
By far the most popular form of casing currently is the card wallet which we print in full colour on both sides.
The Card Wallet
We have noticed a real shift in sales over the last couple of years and this has grown in popularity to become our best selling case option.There are many reasons for its popularity not least because it is very eco-friendly,unbreakable and easy to post. It is most popular however because you can tailor the wallet to print photos , text…whatever you choose…and end up with an inexpensive bespoke product printed on high quality fsc certified 350 gsm box board.
You can then choose to have these cellobagged or shrinkwrapped just to create the complete profession look or for selling online.
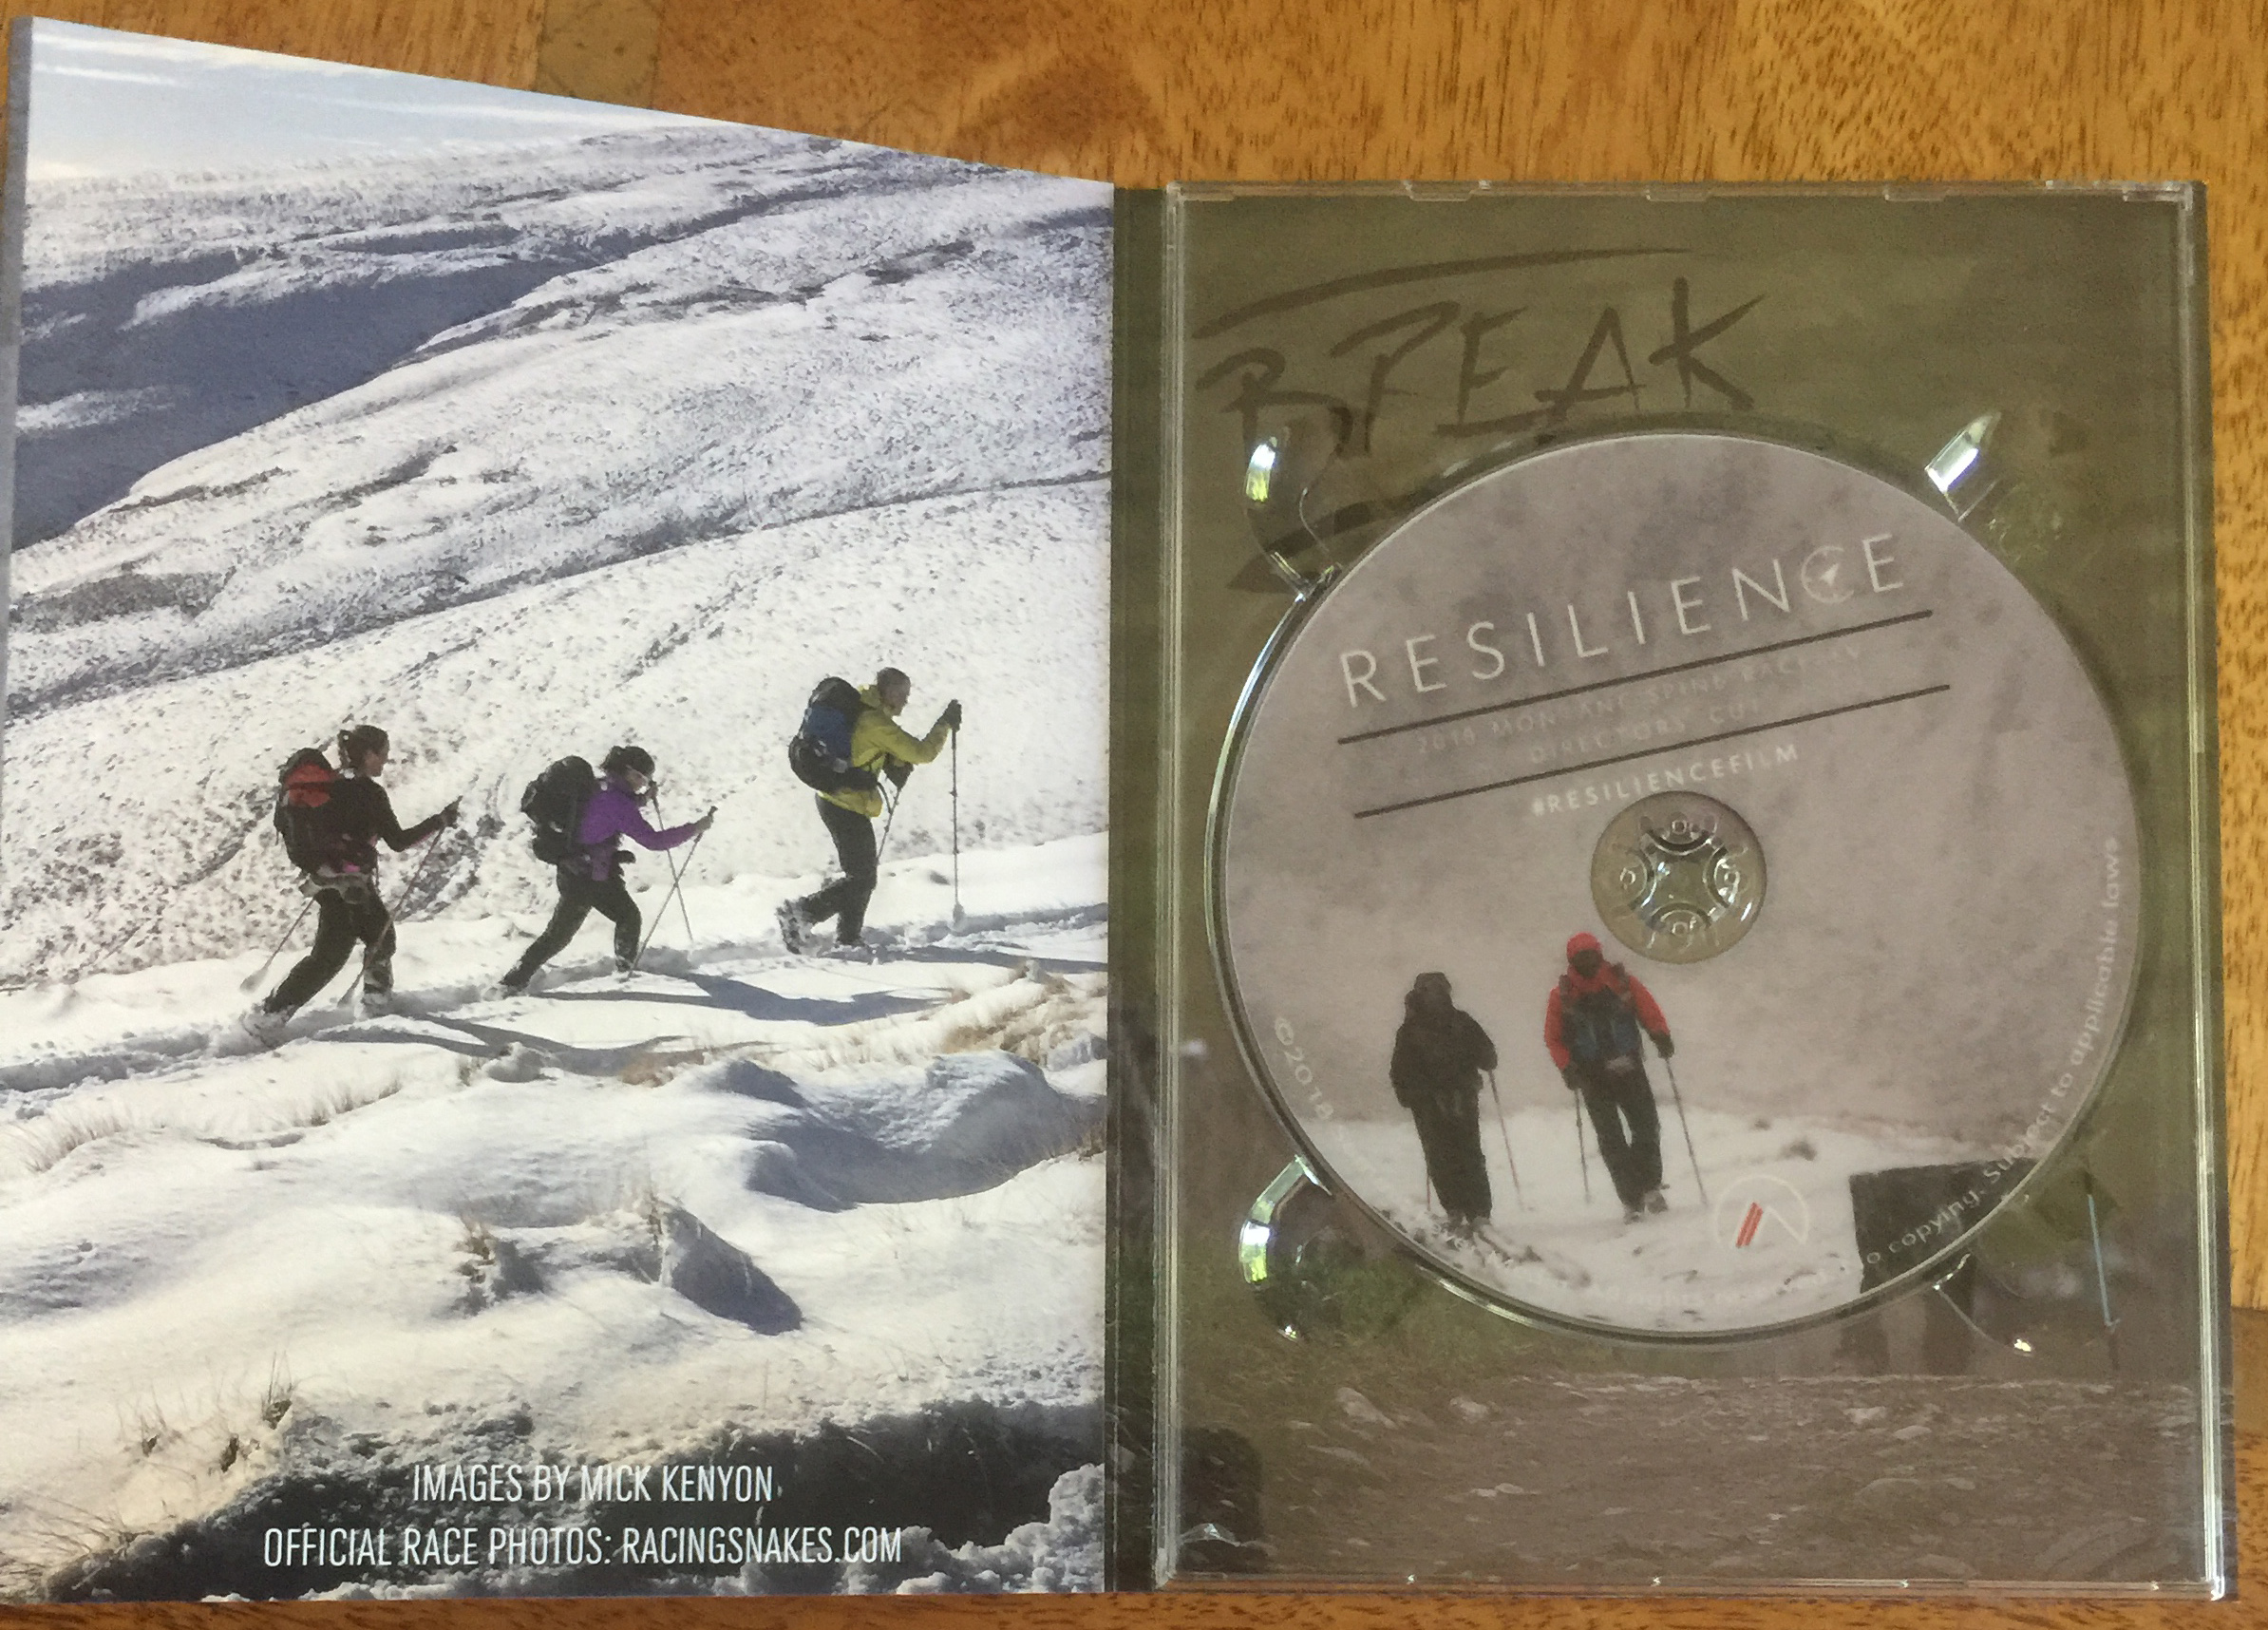
The CD Digi-Pak
Along side this is the CD digi-pak which is a 4 page card option with a clear or black tray for the CD to sit in; this gives
all the same benefits as a card wallet but has the more sturdy plastic tray for the CD to sit in.
And finally in the card range is the 4 page lancing pack which is a double card wallet with one side sealed with glue or left open for a booklet.
The CD Jewell Case
The CD Jewell Case….named because they are said to pick up light like jewells!! …. are transparent plastic, fitted with 2 arms that support the lid…these are by far the most traditional, and were the preferred option for many until recent times.
These too allow you to bespoke your order with 2,4,6 and 8 page booklets giving you the space to include all the information you want to; along with a rear tray,single or double sided for your track listings.
The jewell case also comes in a slimline version where there is no back tray so no art in the back, but still plenty of room for the booklet to be inserted in the front.We have the black tray option on the web-site but can order in a clear tray if you wish.
FOR DVDS
For your DVDS the same decision process applies as with CDS….Do you want printed parts?
As a DVD and a CD Disc are the same size you can have any of the CD casing options if you want to for your DVD….. we do have customers who choose to have a DVD in a slimline cd case for example or in a CD card wallet…..however we do offer some other packaging products which are particularly designed for the DVD.
DVD Digi-pak These are made with the same high quality card as the cd digi-pak but are a different shape…rather more like a book …longer but nice and slimline in design.
Our DVD customers mostly still choose the AMARAY standard DVD case made of plastic which comes in single,double,3,4,5,10 way and so on….
The Standard Amaray DVD Case
They come in all colours but we advertised black and clear as they are by far the most popular.
The clear case gives you the option for a double sided wrap to be printed…the black for just single sided.
This traditional DVD casing can also be ordered with a DVD booklet 2 or 4 page.
Our web-site offers a free artwork creation tool and all the templates for both the disc art and printed paper parts are in our Artwork section. Artwork Creator
If you hover over the case options on the web-site you will also see an image and description of the case in question.After you have done this if you are still undecided give us a call and we’ll use our experience to help you decide. Instant Prices and Ordering
If you care about ecology and the careful and efficient use of our worlds resources you will be interested in reading read this article.
We have always viewed our general efficiency, in all aspects of our work as part of being an eco-friendly and responsible British Company. This includes the responsible choice and use of our own suppliers and supplies, careful budgeting and careful use of power (mainly electricity) and associated machinery. In addition to this we have internal policy regarding the recycling of any waste material.
This article is an informal piece about our most recent thoughts and practices.
From the start we use high quality casing for our Cds,Dvds and Blu-rays with the philosophy that in the long term these will provide the best protection for your discs and although some are plastic, will last a life-time so do not need to be replaced. This is slightly counter culture in what has become a throw away society in many walks of life, but there is common sense in choosing quality which will last; and despite this we still remain one of the cheapest, if not the cheapest for all of our products. There is a great deal of inferior quality, cheap packaging out there that is never use for any of our customers.
Over the 12 years that we have been in the duplication business we have noticed a large shift in the casing that our customers choose for their orders. From the days where nearly all CD’s were packed in a plastic standard jewel case and all DVDs packed in a Amaray plastic DVD cases, we now find that a much larger percentage of customers choose the more eco-friendly options of card wallets/digi-paks.
The card/paper we stock for all our printed parts is FSC Certified and sustainable. We feel this is a better option than recycled paper as research shows that due to the high volumes of bleach used to whiten the paper this is not as environmentally friendly…..which is not good. Responsible sourced and properly managed paper is a green industry, encouraging the growth of trees in the worlds forests. www.fsc-uk.org
In addition our, experience and the feedback our customers give us tells us that paper based products are less susceptible to damage in transit and less costly to courier, deliver and store compared to plastic cases.
Customer choice is highly important to us however and whilst there is a demand for the plastic standard jewell and standard DVD case and we continue to provide these on our web-site.
A large part of our recycling programme is to reuse all the incoming boxes and packaging to supply our out-going parcels.
Protecting orders is our top priority so this comes first however where possible we re-cycle all cardboard, jiffy/mailite bags and packaging, always removing any personal information on them first.
Good House-keeping in the production room means less waste, however on every order we do produce 1 or 2 over-runs of discs. This enables us to keep a control copy here of every order. We have researched widely the re-cycling of CD’s, DVD’s and Blu-Rays and have yet to find a highly sustainable channel for these.
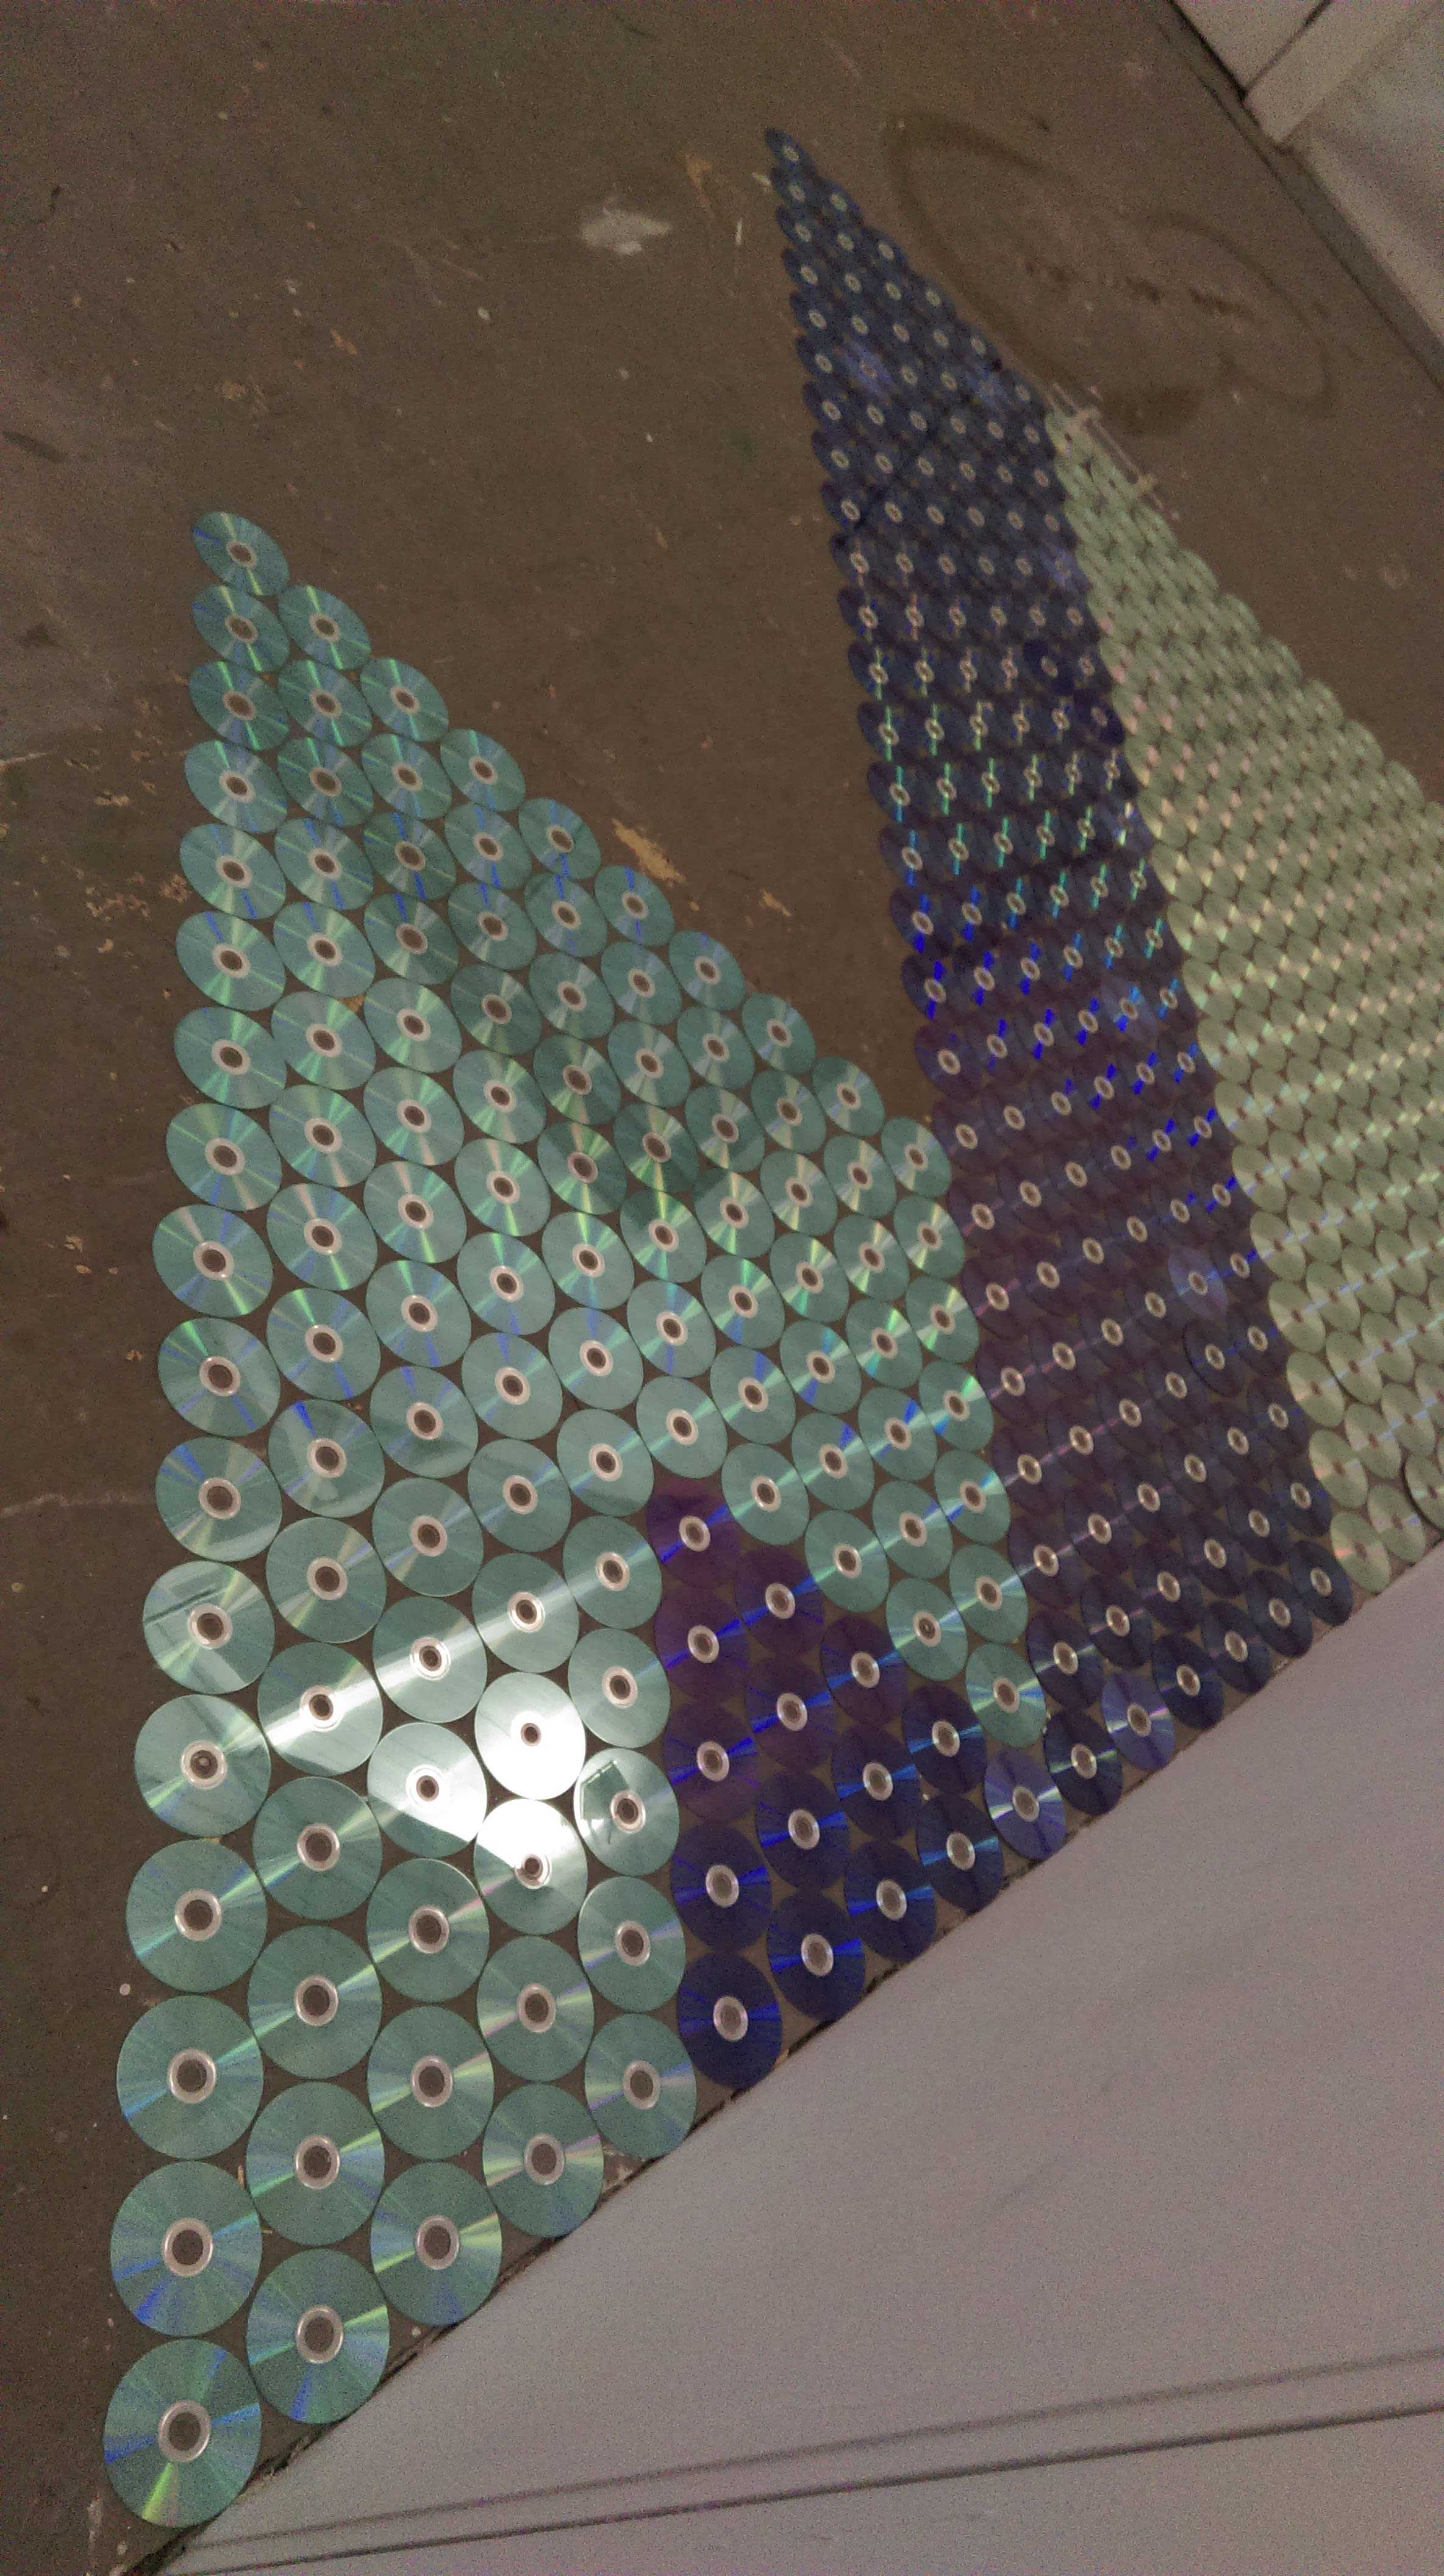
We do however supply unburned discs to artists and students of design free of charge for sculpture or artistc projects.
There are also an increasing number of designers who use discs as the raw materials for projects like garden mosaics, lamps, dishes, picture frames, flower pots, mirrors, coasters and even a disco ball!! See www.zerowasteweek.co.uk for DIY ideas on how to recycle discs.
Another great use for discs is as bird scarers on allotments, they catch the sun if hung and will deter without harming birds who would eat delicate crops.
We minimise the use of paper by having an efficient invoice emailing and chasing system; although we will always send hard copy invoices if requested. We shred all paper that we can and this is re-used for animal bedding and then composted.
In short we view ourselves as a very eco-friendly company and we constantly update and re-visit our processes to see where we can improve and evolve in a productive and conscientious way.
Gained knowledge and know-how is the key here to keeping an efficient and eco-friendly approach in balance for our industry.
We live in an age where all things exist on the cloud, but this is only partly true for the text information’s we see when playing CD-Audio disc.
There are in fact two ways to add track text info to a disc:
In the beginning, not long after CDs were released in the 80s, an update was made so small amounts of text could be added to a CD. This text lives in sub channels of the disc so it won’t effect playback, but a CD-TEXT enabled player can read and display the information. Nowadays these players are less common, but still used in most car stereos unless you’re driving one of a few higher end vehicles.
A common assumption is that most computers read CD text, however this is not the case; iTunes, Windows Media Player etc. do not use CD-Text at all. They use a more modern system, the GraceNote – Compact Disc Data Base (CDDB). With this system none of the text used is actually stored on the disc, but all saved on the internet.
When you insert a CD and view through iTunes for example, the computer identifies the disc and then looks it up on the web. If it cannot find a match it will not display the text information, or may display a close match (from another artist!). So even if you have a CD which has CD text, but is not registered with the CDDB, its unlikely the text will show up on a computer at all.
We have customers who have experienced this problem and fortunately its very easy to correct.
We recommend using iTunes as it’s one of the easiest ways to upload your CD information.
The below link will show you how to do this in just a few minutes:
Getting started releasing my own music was a learning curve. Not only did I have to write all the music (which was fun!), but I had to look at everything that a record label traditionally does, and take figure out how to implement it myself. One aspect was figuring out how to ship a CD. I looked over the different options and figured out a solution that works for me.
I’ll give you a quick overview of those options and why I chose the method that I did.
Options for shipping a CD
There are three options available to you:
Drop shipping
Third party fulfilment
Self-fulfilment
I’ll quickly outline what these different options are:
Drop shipping
Drop shipping is when a third party company creates and ships a product on a per order basis. For example, let’s say Fred buys your record. Your drop shipping company will print a record just for Fred, and ship it to him.
Drop Shipping Pros
You have to do almost nothing
Everything is automated
Low upfront costs
Drop Shipping Cons
Per unit cost is expensive, so you make less profit per sale
Duplication Centre addition: Our sister company can offer this service, please visit www.thedigitalpublishingcenter.com for more information.
Self fulfilment
This is when you take care of every aspect of order fulfilment yourself. Your turn your office / bedroom / house into a warehouse to store and ship your records / merchandise. If you choose to do self-fulfilment, then you need to consider:
Online purchasing system / storefront
Product manufacture
Packaging
Posting
Upfront costs
So as you can see, there is already a lot for you to consider.
Online purchasing system
How are your users going to buy your CD online? You could use third party solutions such as Bandcamp or Shopify; or you could use a solution which integrates with your own website, such as Woo Commerce. Both have advantages and disadvantages depending on your situation and what you want to achieve. I’ll write an article in the future about these options. I’ve tried Woo Commerce and Shopify myself, and personally, I prefer Shopify.
Product manufacture
You need to find a company that will physically create a CD for you. When it comes to CDs, you have two options:
Duplication
Replication
Duplication is for small jobs (usually up to 1000 copies). This is the same process as you would use to ‘burn’ a CD on your home computer, on a more industrial scale. Duplication also has a fast turn around time.
Replication is for bigger jobs (500 units upwards) and while it has a higher setup cost than duplication, at higher volume it is cheaper. Replication involves creating a glass ‘master’ disc and then physically stamping blank CD. It takes longer than duplication.Please see our sister company www.replicationcentre.co.uk for more information on this.
The best company I have found in the UK for duplication is The Duplication Centre. They usually ship my order within a couple of days and they give things a once over to make sure the order is ok. They also keep your order on file, making it really fast and easy to get a second printing done. If you sign up to their mailing list, they usually send out some special offers for free extra units every few months.
If you are in the UK, they are highly recommended and you can check them out here. Check them for yourselves – their policy or approach may have changed since writing this article.
Packaging
How are you going to post your CD? You need some sort of packaging. You want to balance having something low cost, with having something that can protect your product – if your CD turns up smashed, scratched or damaged; even if it isn’t your fault, your fans will be pissed off.
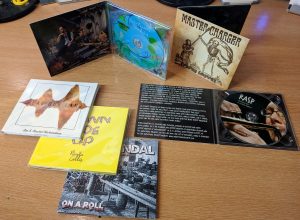
The best packaging solution I found are card wallets from lil packaging. They are durable, protect from light impact, scratches and drops. They also ‘expand’, so you can put a thin card wallet promo CD in, and have a slim package; or you can put a full size jewel case in there and the card wallet will ‘expand’ a bit. Check out the photos.
Finally, they are pretty cheap per unit, and the price per unit crashes with scale. Check out low cost durable packaging for your CD here. Price per unit is anywhere from 30p/unit to <1p/unit depending on the quantity purchased.
Here are some photos of what the CD mailers look like (got a big box of 150 I think it was, to hit the price break and get a cheaper per unit price):
My box of CD card wallets looks like this
Inside view of box of card wallets. I tore a corner in the side to make them easy to get to, when stuff is stacked on top of this box
A bunch of CD wallets spread out
Front view of card wallet (address goes here)
Rear view of card wallet
CD wallet stays nice and slim when using card wallet promo CDs
Wallet expands to fit full size jewel case CD
Posting
There are a few options for this. For most people getting started, taking a bag of packaged CDs down to the local post office is probably the best solution. Get yourself a sharpie and write the addresses on the front of your card wallets by hand. You will want to check postage rates so you don’t get any nasty surprises and set up your shipping on your website / online store appropriately.
A great way to check the weight of your item is to grab a cheap set of digital weight scales that are accurate to roughly 2g (and if you use imperial will switch to ounces). Then you can accurately measure the weight of your CD / merch and make sure you don’t get any surprises at the Post Office.
Upfront costs
As you might have noticed, one aspect of self fulfilment is that, when compared to drop shipping, there are upfront costs to handle. Rather than having a CD made per order, you now have to buy 20-100 units at a time and the packaging to go with them… and your sharpie. So you start to need a bit of capital. However, you will find that your profit margin is much, much higher per unit, than drop shopping.
You should be able to get the CDs created and packaging for less than £3 per unit, so if you are selling your CD for £10-£15, that is a profit per unit of £7-£12.
Self fulfilment pros
More profit per unit – this is a LOT cheaper than drop shipping, so for a given product price, you will make much more money
You can customise the user experience more
Better control over data
Self fulfilment cons
Your house turns into a warehouse
You have to do more planning, to source your products and packaging.
You have to pay a lot more upfront
Self fulfilment conclusion
While it is a bit more work, this is probably the best way for most musicians getting started to go. The work involved is not really that much at all, and you make more money per sale.
Third party fulfilment
Third party fulfilment involves setting up your own supply chain. This is similar to taking self fulfilment, and taking it to the next level, turning it into a miniature business. You take your manufacturer and you connect them to a shipping company, or, you take self fulfilment and you pay someone to run it for you. Paying someone to run your self sfulfilment is pretty simple so I’ll give you a quick overview of third party fulfilment using an external company.
Orders come through from your website and are automatically sent to your shipping company. The manufacture(s) ship directly to your shipping company, who put your items into warehousing. Shipping company takes incoming website orders, takes the appropriate items from the warehouse and boxes them up (this is referred to as “pick and pack”) and ships to the consumer. They sometimes have in house packaging solutions, so you don’t have to worry about that either.
A third party fulfilment will typically charge you a warehousing fee and a ‘pick and pack’ fee.
Third party fulfilment pros
If you have the order volume, you can scale to huge levels
You still keep a high profit margin per item
Automated, so you have very little to do. Shipping 10,000 units per month with this method will be less work than shipping 100 units a month with self fulfilment.
Postage is cheaper. The shipping company gets preferential shipping rates that are much cheaper than you can get at a Post Office, due to the volume they do.
Third party fulfilment cons
You have to be highly organised with stock management
You have a lot of costs to organise and figure out
You have to organise two companies to work together
You have to integrate your order platform with the shipping company
You need to be shipping a high volume of products to make this worthwhile
Conclusion
I would have thought for most independent musicians (if you have a record label, all this is taken care of for you), starting with a self fulfilment model and then ‘graduating’ to a third party fulfilment model will work best for you. I’m still in the self fulfilment phase.
Recommended Companies
This is a quick round up of the companies I’ve used that offer a great service with a great price (that are UK based):
lil packaging
These guys offer solutions for all your packaging problems, not just CDs! They do boxes for shipping your merch, boxes for books, boxes for this and that. They got you covered. A vital company for any band (or individual, small business) shipping their own products. Check them out
Duplication Centre
Whether you want card wallet CDs, digipaks, jewel case CDs, these guys have you covered. Their website looks a little bit old school… but it works. You can get a fully customised quote in minutes. Price per unit decreases with order volume which is nice. Check them out
The Blu-ray Disc founder group was started in 2002 by MIT and nine leading Electronics Companies: Sony, Panasonic, Pioneer, Phillips, Thomson, LG Electronics, Hitachi, Sharp and Samsung Electronics.
The name is taken from the blue laser that is used to read from and record to a Blu ray disc, the blue laser allows for a much higher density and hence a larger storage capacity and so the Blu-Ray disc is a digital optical disc data storage format.
It was designed to supersede the DVD format, and is capable of storing several hours of video in high definition (HDTV 720p & 1080p) and Ultra High Definition Resolution (2160p).
Although the Blu-Ray disc looks exactly the same as a DVD in size and shape there are many differences between media including storage capacity,laser technologyand discconstruction,image resolution and player compatibility.
The Blu-Rays storage capacity is measured in gigabytes (GB), like computers and ipods.
Storage Comparison:
DVD Single Layer: Can store about 4.7GB data which is about two hours worth of movie at Standard Definition…these are commonly referred to as DVD 5’s.
DVD Dual Layer: Can store twice the amount of data at 8.7 GB which equals about four hours of movie at Standard Definition ….these are commonly referred to as DVD 9 ‘s.
Blu-Ray Single layer: Can store approximately 25Gb data, this equals about 2 hours of High Definition Information or 13 hours of Standard Definition Information.
Dual Layer Blu-Ray :can store about 50GB data which is about 4 hours of High Definition Information or 26 hours of Standard Definition.
Laser Technology
Lasers are used in both DVD and Blu-ray technology .As the disc spins the laser reads the information stored on the discs and transfers both the picture and the sound to the television.
DVD: DVD players use a red laser at 650nm wave length to read DVD discs
Blu-Ray : Blu-Ray players use a Blue laser to read the stored information; the wave lenghts are shorter than the red at 405nm and are smaller in diameter, this allows for a closer and more precise reading of the information on the disc.
Disc Construction:
Physically DVD and Blu-Ray discs are the same in appearance:both have circular tracks on their bottom layer that enables the laser to read information stored on the spinning disc.
The tracks on a DVD are much further apart than on the Blu-Ray; you will see that it follows from this that the amount of information that can be stored on each type of disc is different; the Blu-Ray having the far greater storage capacity.In short a Blu-ray can squeeze about 5 times as many tracks onto the same size disc as a DVD.
Both DVD and Blu-Ray have a protective layer designed to resist scratching; the Blu-Ray in addition has a hard coating that makes it more scratch resistant.
Image Resolution
This is measured by the number of vertical lines times the number of horizontal lines of light in a picture.It is represented by the number of horizontal lines going across the screen like 480, 720 or 1080.The higher the number, the higher the resolution the more detailed the picture you see.
DVD: Almost all DVD’s have standard definition of 480 or enhanced definition of 520.This look ok on a standard television,utilising all the available pixels on the screen. If however this is blown up to a large HDTV the picture may look grainy.
Blu-Ray: The Blu-Ray was designed for the high definition 1080 display….since they can store 25 GB data you can fit a whole High Definition movie on a single layer. Blu-Ray currently has the best image resolution on the market and looks amazing on HDTV, they are one of the only sources that display in 1080.
Player Compatibility:
Happily Blu-ray Players support DVD’s and the image will be decent but obviously not the high definition quality of a Blu-ray.
Due to the larger lasers used in DVD players they it cannot read the tiny grooves on a Blu-ray disc.
In short you can play a DVD in a Blu-ray player but you cannot play a Blu-ray in a DVD player.
Lastly and very importantly Blu-Ray can handle 4K (Ultra HD)...we don’t need an new type of disc for our new TV’s; you can have it all with the Blu-Ray !
Even in this age of digital streaming the CD still has value in the music industry.
Listeners, especially those of the younger generation understandably turn to streaming services like Spotify and Apple Music.
The outlook for the humble CD from some perspectives in the music industry may look a little dreary but the reality for many bands and music artists is that they aren’t seeing a slow down in CD sales at all.
Artists still want to offer something tangible to offer their fans.
Time and time again we hear from bands that the Merchandise table is an increasing and valuable source of revenue.
It is true, music lovers always want to buy something to take home with them, whether it be a CD or a T Shirt…they are affordable, and a link to the music they love.
Again the recent resurgence in Vinyl is testament to this, and artists who stock both CD and Vinyl on their Merchandise table have seen that while the vinyl did well, the CD’s sold out quicker; particularly older catalogues. An understandable outcome as Cd’s are easier to produce and cheaper to buy, also more profitable to sell than Vinyl….they also sound objectively better!
It would also appear from recent research that certain genres of music are more CD bias in their demand than others: these being, Indie, Jazz,Gospel,Classical ,Children’s and Seasonal (like Christmas Music).
All this points towards the music industry having room for all mediums of technology,Vinyl,CD and Digital .
Our consumer driven society dictates that we have right to demand that music is made available to us in every way that it can be. While there will always be many digital only albums almost all commercial releases continue to be available on CD also.
The CD’s resilience has been aided on a practical level by the process of Duplication which involves the burning of audio directly into ready made discs.
Duplication of runs of as little of 50 units enable the artist to go directly online and within hours upload audio and art and have the final product within days. Many also opt to have the product shipped directly to gigs as they travel, giving the ability to bump stock if needed and avoiding carrying weighty product with them.
The CD is still going strong!
Want more facts and figures, take a look here: www.fastcompany.com (the cd business isn’t dying)
In today’s society everything is done by internet: Emails whizz from company to client, children do their homework via the web, people illegally download music and video from the internet… This last, the pirating of music and film, is becoming an ever-growing problem in our technological world. But it doesn’t just occur on the internet: Pirated discs can be bought as well! But what effect is this having on our music and film industries and is it such a big problem that we need to worry about its effect on the CD and DVD manufacturing world?
The answer, unfortunately, is yes! We do need to worry about it: The music and film industry is an expensive business to run: With hiring actors and musicians, studio fees, pre- and post-production costs, disc duplication, advertising and distribution of the product there is a lot of money being sunk into making the product in the first place. There is a delicate balance between the money being sunk into films and music and the money being made from these to produce more films and music and if we as the public begin to pirate the products, there will not be enough money going into the cycle to make CD and DVD manufacturing continue.
Of course occasionally you get a film such as Lord of the Rings or Titanic which makes an absolute mint but for the most part films just about make back what was spent on them in the first place, if not even making a loss. The same can be said about music: Michael Jackson and Madonna may be incredibly wealthy but there are literally thousands of bands who every year scrape by. Is it really fair to pirate the work of these people?
Piracy has become a serious offence in many countries now, with the media recording cases of suing up to and over £60,000 pounds – a lot of money in anyone’s books! And yet it is still happening: Loop-holes are being found or people are simply taking the risk so that they can save money in the short term. But the effect this is having on our music and film industries is palpable and soon the cycle of money going in and out could get so broken that both industries will collapse entirely and there will be no more CD or DVD manufacturing!
So what can we do to help? Well, the answer is simple: Don’t use pirated goods! Don’t download illegally off the internet! Whether you use pirated goods or simply buy them, you are still enjoying the same product (nearly always at a higher quality if you buy it, as well!) So why not support the industries so that they can produce more music and film while you’re at it? Get a higher quality product and keep film and music alive by buying legitimately rather than pirating!
Posted in Helping You Decide, History | Comments Off on The Fight Against Illegal Pirate Videos and Music
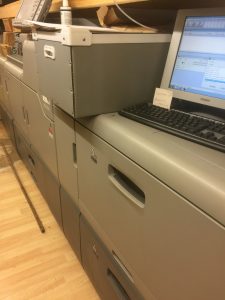 me designing artwork for their orders so with this in mind we invest in a State of the Art printer technology which is second to none for print production.

 all the same benefits as a card wallet but has the more sturdy plastic tray for the CD to sit in.